
 deutsch
 français
 nederlands
 italiano
 español


Our top auctions
About nicsell
Nicsell is a domain backorder service, also known as dropcatcher, that allows you to bid on several expiring domains. Due to our low starting prices and high success rate we proudly present to you the best price-performance ratio in the German region.
Starting from € 10 you will already be able to participate in all our auctions and gain the chance to receive the domains you want. A failed registration means you do not pay anything.
At the same time you are also able to put your own domains up for auction. Give nicsell a try and we will make sure to win you over with our diverse services and our many years of experience.
Our domain extensions
 .cz
.cz
 .me
.me
 .it
.it
 .be
.be
 .fr
.fr
 .uk
.uk
 .nl
.nl
 .es
.es
News

Sale of og.de
The domain og.de was sold through our marketplace for €10.710. We are pleased to have the opportunity of sharing this success of nicsell Trading with our customers.
Recently registered
Why nicsell?
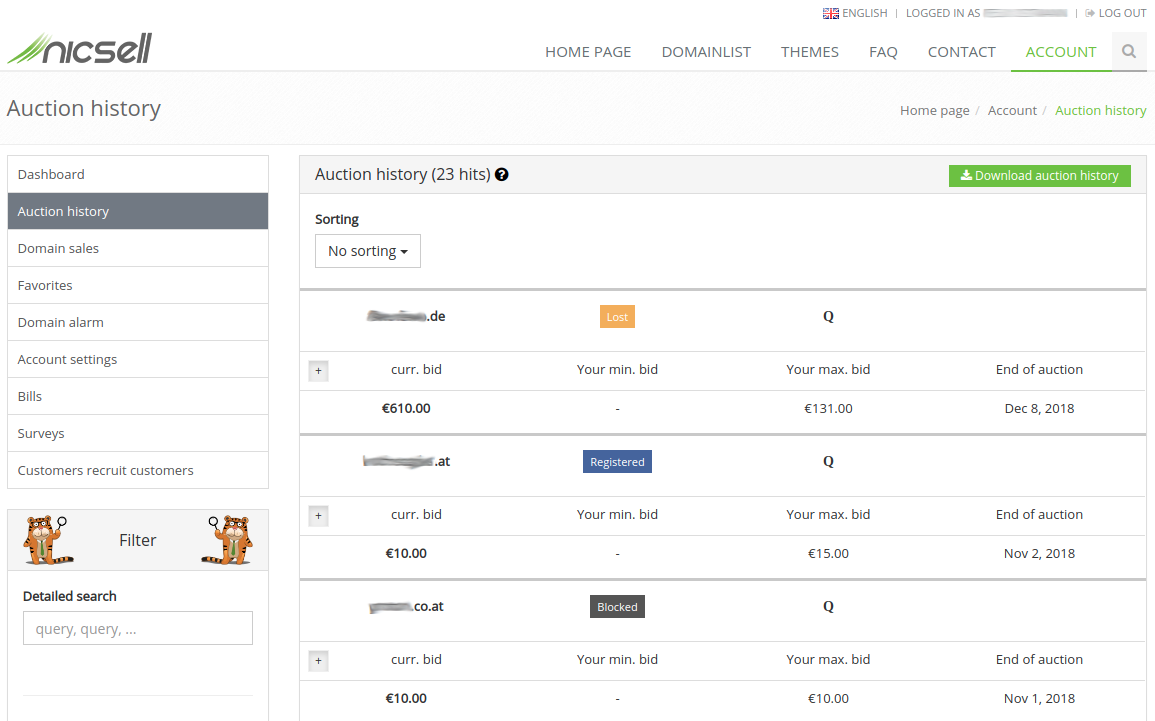
Here you get an insight of how the auction history looks like.
Customer ratings
Our partners
©2014-2024 nicsell.com - All rights reserved.
Servertime: Thursday, April 25, 2024 8:16:07 AM Central European Summer Time
https://nicsell.com/en